Custom Domains and Gmail
This post walks through the process of using Gmail with a custom domain name for free.
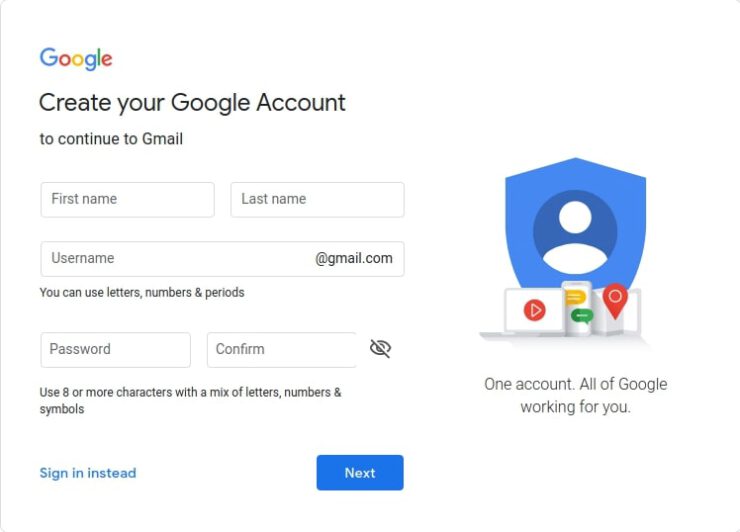
1. Create a Gmail Account
You can use a personal Gmail account or create a new one. Either way you will need an account. Personally, I like to keep my professional and personal accounts separate.
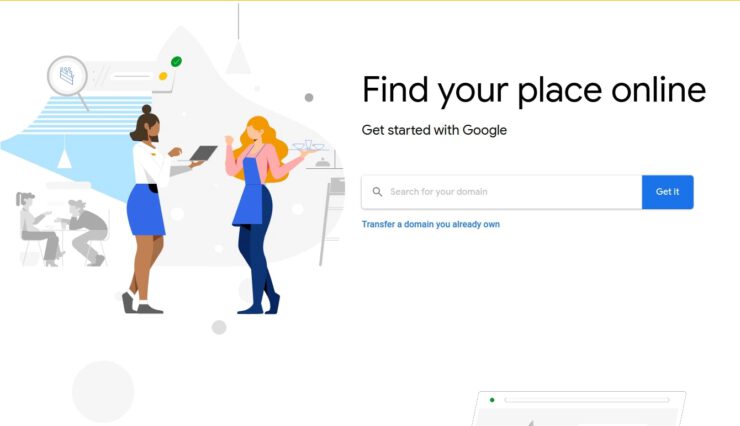
2. Purchase a domain
Next, you will need a domain. If you have one, feel free to skip this section.
I purchased this domain from Namecheap, but I hear good things about Google Domains. Students can get a free/discounted domain with the GitHub Student Developer Pack.
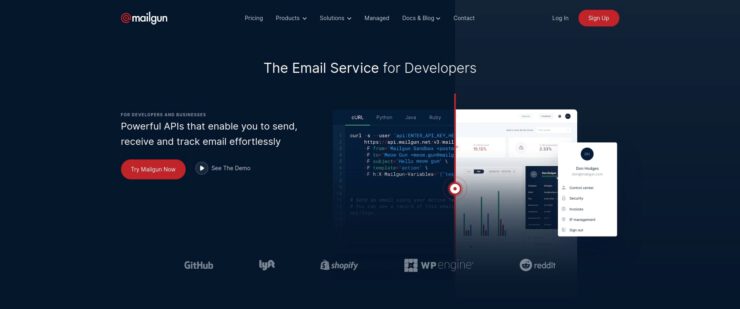
3. Create a Mailgun account
After this step the real fun begins. I use Mailgun as my domain’s email service. Some DNS providers have an email forwarding service, but this tutorial does not explore that route.
Mailgun does require a Credit Card on file to send emails. After you create your account, don’t forget to confirm your email address.
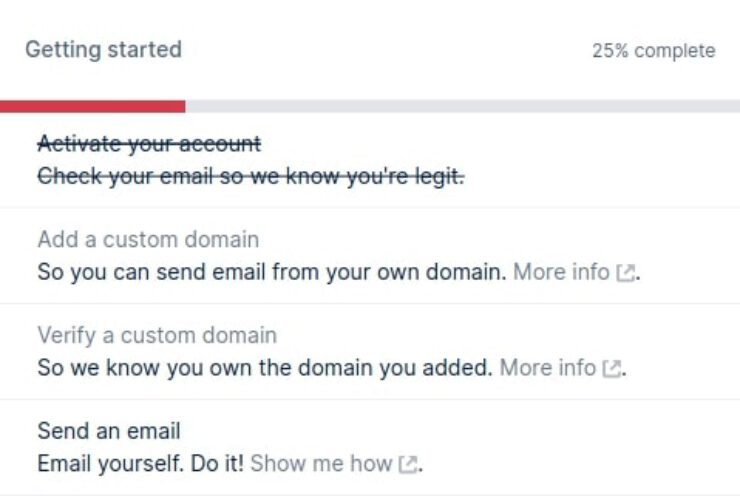
4. Add and verify your domain
Find the Getting Started section on the right-side of the Mailgun dashboard. Follow the link to Add a custom domain.
Create your subdomain (patrickt.one). Keep the Create DKIM Authority checked and select 2048 for extra security.
Mailgun provides step-by-step directions for adding the DNS records for your DNS provider. I recommend you add all the records to your DNS records (2 TXT, 2 MX, and 1 CNAME). Now we wait for the DNS records to update (may take up to 48 hours…).
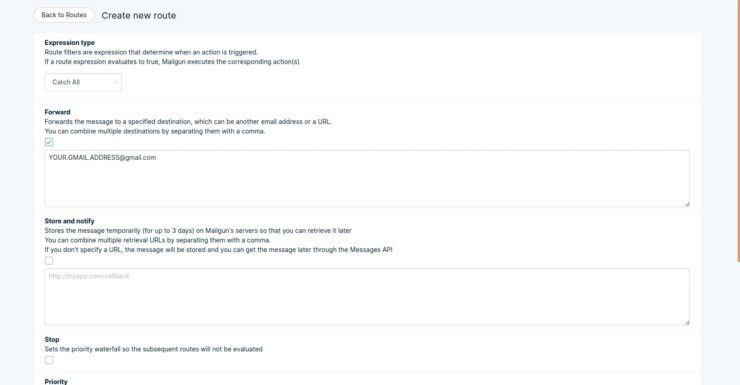
5. Set up routing
With Mailgun you have the ability to set up routes (Receiving > Create Route). This allows you to forward mail to different email addresses. With a personal domain, I find having one catch all route sufficient.
- Expression Type: Catch All
- Forward: Selected + your gmail address
- Priority: 10
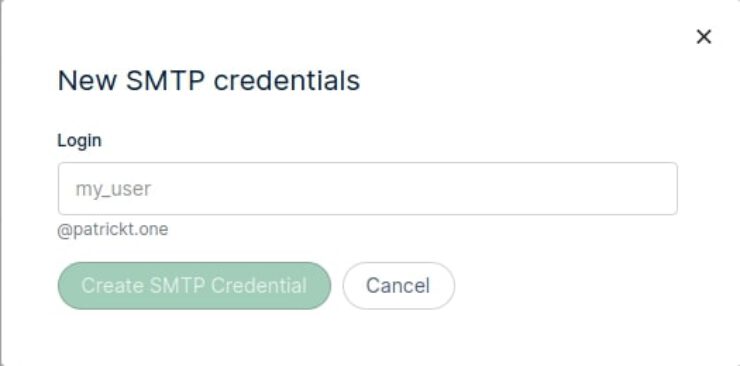
6. Set up SMTP credentials
Now you need to create STMP credentials for the account you want to send emails as. Note: the catch all route allows you to receive all the emails, but you’ll need STMP credentials to send emails from Gmail.
To add an STMP credential, navigate to your domain settings (Sending > Domain settings > SMTP credentials > New STMP User). Choose the email address you’d like to send emails as (hello@patrickt.one). Take note of the password.
(Optional) Set up Open tracking
Go to the Domain settings > Open tracking and set tracking to On.
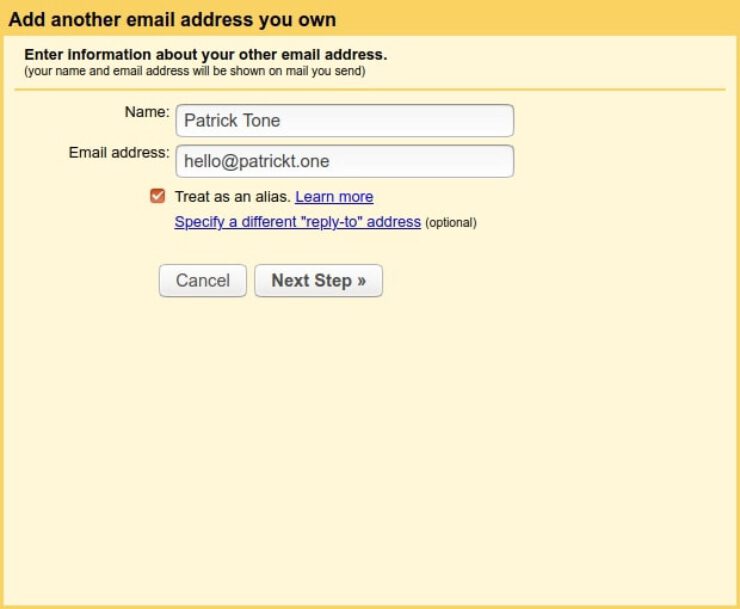
7. Send from Gmail
Finally to Gmail. On the right side of the page, click the gear icon > Settings > Accounts and Import > Send mail as > Add another email address.
-
Name:
your name (or whatever you'd like to show up)Email address:
<the SMTP email address you created (hello@patrickt.one)>Treat as an alias:
checked -
SMTP Server:
smtp.mailgun.orgPort: 587
Username:
hello@patrickt.onePassword:
<password from earlier>Secured connection using TLS:
selected
If everything goes as expected, you will receive an email from Google with a verification code (or link).
Voilà! You can now send emails with your custom domain with Gmail.